Frustaci Family Pizza
Intro
We bought a Gozney Pizza Oven on our Baby Moon in Santa Barbara and had a tough time figuring out how to make delicious pizzas on our own. Fortunately, our great friends, Giovanna and Tomasso Frustaci, came to our home in St. Charles to help us master the art of fresh, homemade Italian pizza in our pizza oven.
What You’ll Need
Gozney Pizza Oven or similar
A big towel (you’ll wrap the dough bowl while it rises)
12oz (ish) water cup (or Pyrex measuring glass)
Ingredients
12 oz Water
3 Lbs(ish) of Flour (or pizza flour, we like King Arthur’s) will make ~6 small pizzas
1 1/2 Tbs Active Dry Yeast
1 oz Olive oil (we like Graza’s)
½ Tbs (ish) of Salt to taste
Oregano (or your fav Italian Seasoning mix)
Parmesan (the kind that comes in the shaker)
Fresh mozzarella (the Belgioioso 2-pack is perfect)
Pizza sauce or marinara sauce (we like Rao’s)
Assortment of fresh veggies and meats — we typically get Italian Sausage, Pepperoni, etc.
Instructions
For this recipe you’ll make the dough first, then let it rise for about an hour. During this time, you can get the pizza oven going so it’s nice and hot (Gozney says you’ll want to preheat your Roccbox to 800°F, the Italians agree). Once the dough has risen, and the oven is hot, you’re ready to rock. Instructions are as follows.
The Dough
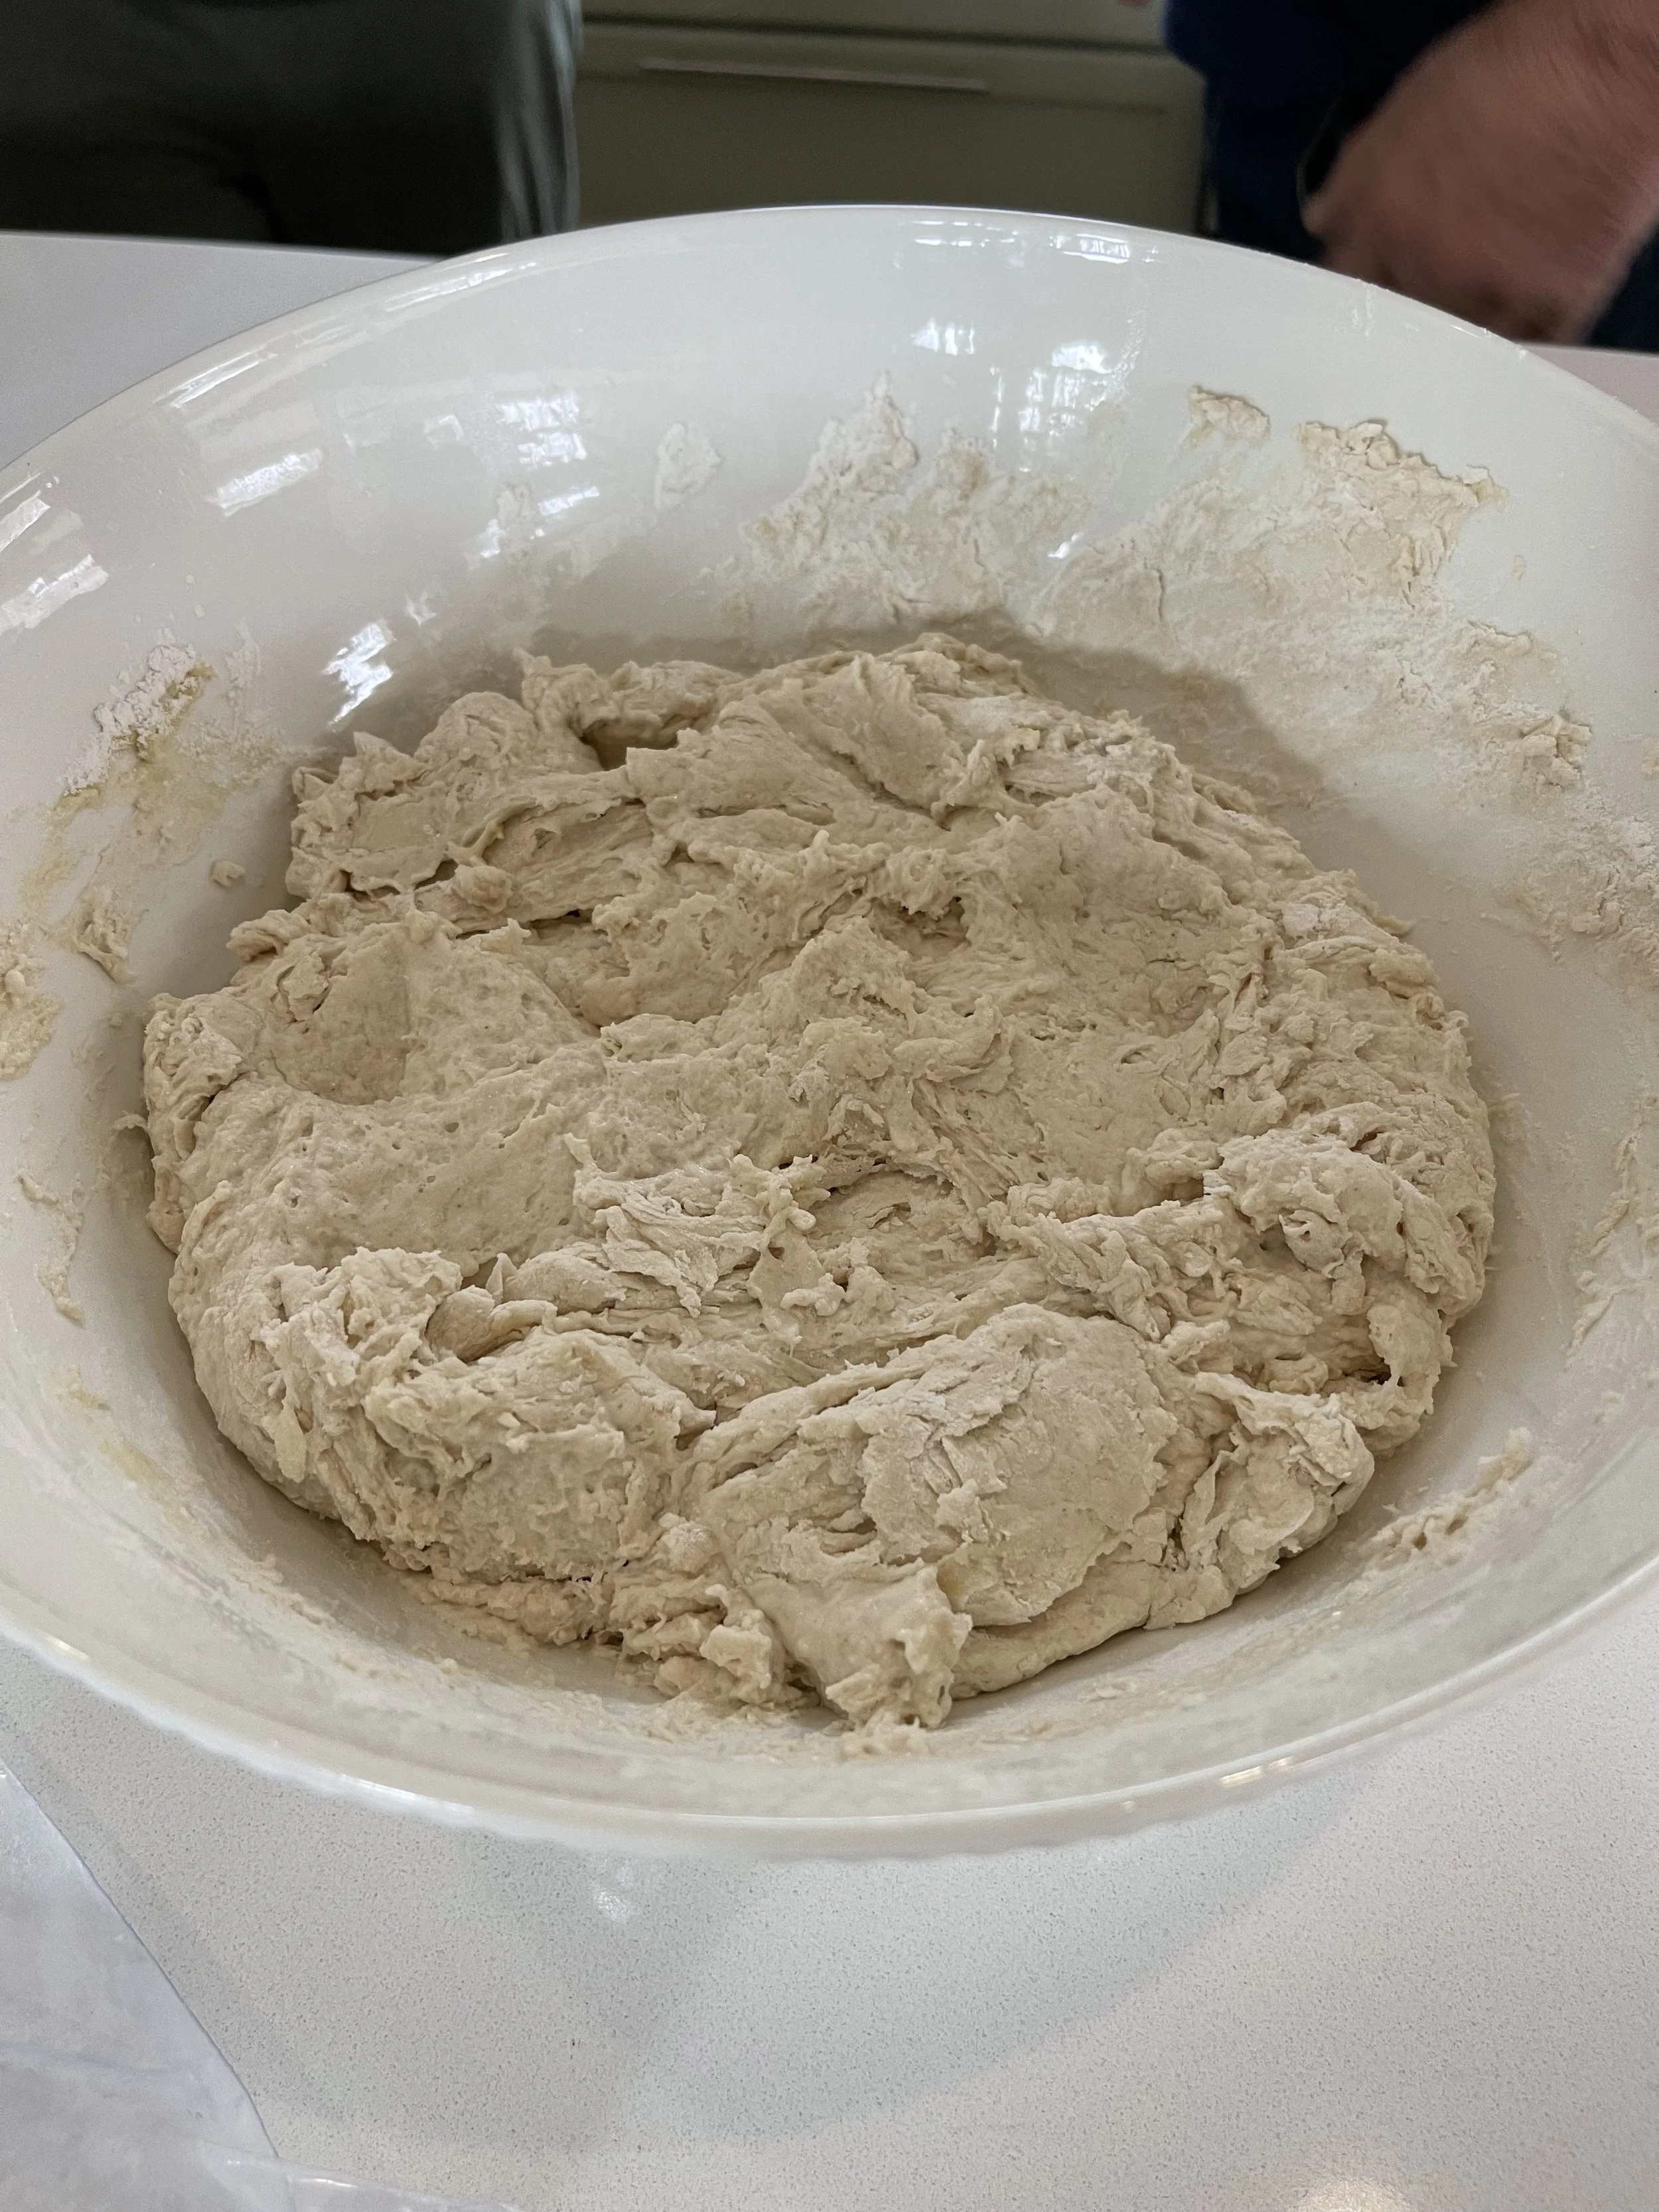
Note: What your shaggy dough should look like before you cover with saran wrap and a towel to let it rise.
Grab your 12oz (ish) water cup (or Pyrex measuring glass) and fill it up with about 12oz of warm-ish (but not hot!) water. Add the 1 1/2 Tbs Active Dry Yeast and 1 oz Olive oil (we like Graza’s). Let sit for about 5 minutes.
While that’s sitting, grab your big mixing bowl and wooden spoon. Add your 3 Lbs(ish) of all purpose flour (or pizza flour) and ½ Tbs (ish) of Salt to the bowl. Mix together.
Now you’ll mix the dough — to do so, add your yeast/water/olive oil combo to the flour mixture and stir until you start forming dough. You don’t want your dough too dry, and you don’t want your dough too wet, so if your original water mixture doesn’t seem enough, add additional water little by little until your dough is ready — when it looks a little shaggy and lumpy, you’ve achieved the right consistency and you’re ready to let it rise.
Let it rise — cover with saran wrap and wrap your bowl in a big towel. It’s going to sit here, covered like this, for an hour or so.
Now it’s time to knead the dough — Sprinkle flour on your countertop to give yourself a work space for kneading the dough. Pop that dough out of your mixing bowl and onto your freshly floured Note: the goal here is to take your dough from shaggy and lumpy, to smooth and slightly tacky to touch. If your dough holds it shape when you hold it up, that's a good sign it’s ready.
The Pizza

Note: What your dough balls will look like if you’ve done it right!
Pre-requisites — It’s been an hour and your dough is ready! Your pizza oven is heated up to 800°F.
Prep your dough balls — Take your dough ball out of the bowl it’s been rising in and break into about 6 equal dough balls, these will be your pizza crusts for your 6 pizzas. If you don’t use them all during this time, you can store in the fridge for up to 3 days. Note: it’s best to make pizza using one dough ball at a time, because it’s important that your dough stays relatively cool and holds shape on your Cornmeal-coated, wooden pizza peel before you put it in the oven. So even though it could be tempting to get all 6 pizzas ready for the oven at the same time, don’t do this.
Make your first pizza —
Press your dough into shape — Sprinkle flour on your countertop so you have a fresh working space, grab one dough ball and press it into a pizza shape in your working space, flipping it one to three times until you have a shape you like.
Prepare your wooden pizza peel — Sprinkle cornmeal on your pizza peel to make it easy for your dough to slide off the pizza peel into the oven.
Transfer dough from counter to pizza peel — Lift your pressed dough off the counter and flip it onto the pizza peel to continue preparing your pizza.
Make-a-da-pizza — Spoon about 2 Tbs of pizza sauce onto your dough, then sprinkle with oregano and parmesan. Next, add your favorite meats, and finally, over the top, add your mozzarella. Your pizza is ready for the oven!
Get that pizza in da oven — Take your pizza on the wooden pizza peel to the pizza oven and give it a little shake to get it off the peel into the oven keeping it as flat as possible (this might take a few tries to get the motion down).
Let that cook there for about 1 minute, but keep an eye on it, this is a very active process! Once you can see the crust closest to the fire in the oven is starting to look cooked, you’ll give this pizza a quarter turn using your turning pizza peel. Continue tending to the pizza and doing these quarter turns until it’s done. You don’t want to burn it, so this active tending to the pizza is critical!
Get that pizza out of da oven — Once your pizza is nice and cooked, pull it out of the oven using the turning pizza peel and put it on your cutting/serving board to slice it up using a knife (we love our Shun) or pizza slicer (we love our Oxo)!
Get that pizza in your belly — Serve your hot and ready pizza to your friends and family, and tell them you made it with love!
Repeat this process until you are good and full, and perhaps, ready for a nap. Night, night! :)

Note: This is what you don’t want! This is the result of 1) not using a wooden pizza peel to put the pizza in the oven, 2) letting the dough get too warm and therefore it was sticky on the pizza peel and wouldn’t pop off, and 3) the pizza flick maneuver not being great. This will PROBABLY happen to you when you make pizza for the first time in your pizza oven, it just means you care. Try again. You got this!
The Finished Product
If you do it wrong, your pizza will look like the one on the left. If you do it right, it will look like the one on the right. Good luck! Keep trying until you get consistently awesome results. Next thing you know, it will be second nature. You got this!

Not right — Oopsie!

Absolutely perfect — Yummy!
Enjoy!
I hope you love this pizza recipe! We’ve had many a special days with “The Italians” making pizzas in their backyard, so it was such a treat to have them over to learn to make pizza in our home and backyard. I hope you are successful making your own pizza, and can’t wait to hear what your favorite toppings are.